
Bifold doors are an increasingly popular choice for homeowners looking to enhance their living spaces. They offer a seamless transition between indoor and outdoor areas, allowing for natural light and ventilation while creating an open and airy feel. However, installing bifold doors can be a complex task that requires careful planning and execution. In this article, we will explore the key steps involved in bifold door installation, the tools you'll need, and some tips for ensuring a successful project.
Understanding Bifold Doors
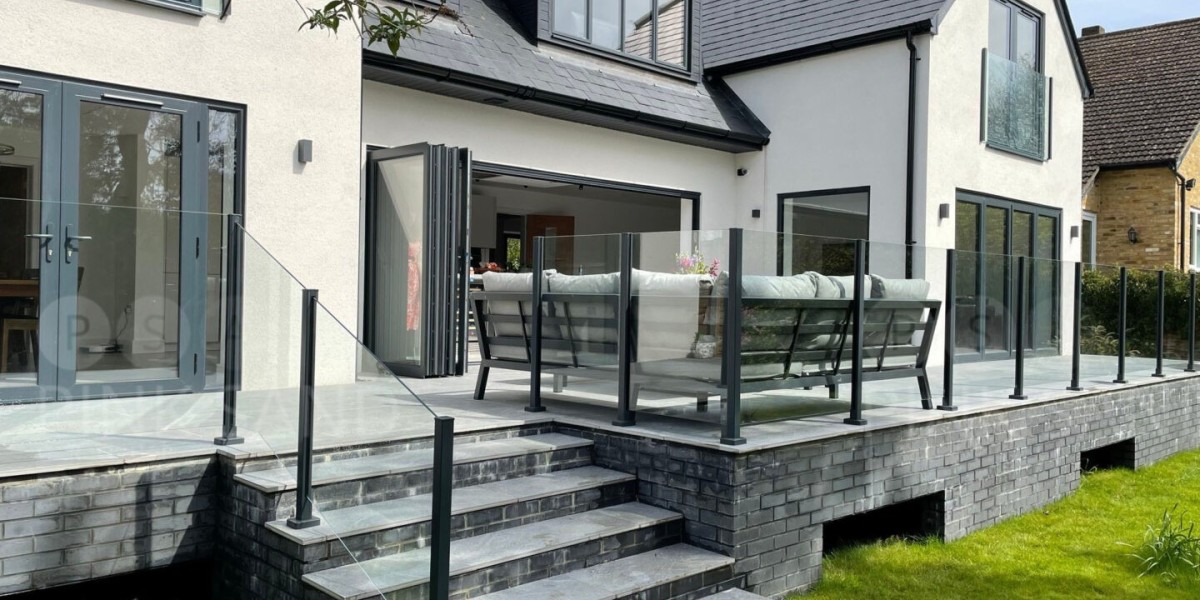
Bifold doors consist of multiple panels that fold against each other when opened, creating a wide opening. These doors can be made from various materials, including wood, aluminum, and uPVC, each offering different aesthetic and functional benefits. When selecting bifold doors, consider factors such as durability, insulation, and maintenance requirements.
Planning Your Installation
Before you begin the installation process, it’s essential to plan carefully. Here are some steps to consider:
- Measure Your Space: Accurate measurements are crucial for a successful installation. Measure the width and height of the opening where the Bifold Doors; click the next webpage, will be installed. Be sure to account for any obstructions, such as light switches or heating vents.
- Choose the Right Style: Bifold doors come in various styles and configurations. Decide whether you want a two-panel, three-panel, or more complex system based on your space and aesthetic preferences.
- Select the Material: As mentioned earlier, bifold doors are available in different materials. Consider the climate in your area, the style of your home, and your budget when making your choice.
- Check Local Building Codes: Before proceeding, ensure that your installation complies with local building codes and regulations. Some areas may have specific requirements for door installations, especially when it comes to safety and energy efficiency.
Tools and Materials Needed
Having the right tools and materials on hand will make the installation process smoother. Here’s a list of what you’ll need:
- Bifold door kit (including panels, tracks, and hardware)
- Measuring tape
- Level
- Screwdriver (both Phillips and flathead)
- Drill with drill bits
- Saw (if adjustments are needed)
- Hammer
- Wood shims
- Caulk and caulking gun
- Safety goggles and gloves
Step-by-Step Installation Process
Now that you have everything prepared, it’s time to install your bifold doors. Follow these steps for a successful installation:
Step 1: Prepare the Opening
Ensure that the opening is clean, level, and free of any debris. If necessary, use a level to check that the floor is even. If the floor is uneven, you may need to use shims to create a level surface.
Step 2: Install the Top Track
Begin by installing the top track for the bifold doors. Use a level to ensure it is perfectly straight. Mark the screw holes with a pencil, then drill pilot holes for the screws. Secure the track in place using screws, ensuring it is firmly attached to the framing.
Step 3: Install the Bottom Track
Next, install the bottom track. This track will guide the bottom of the bifold panels. Similar to the top track, ensure it is level and secure it with screws. If the floor is uneven, you may need to adjust the height of the bottom track using shims.
Step 4: Hang the Bifold Panels
With the tracks in place, it’s time to hang the bifold panels. Start by inserting the top pivot into the top track and then lower the bottom pivot into the bottom track. Repeat this for each panel, ensuring they are aligned properly. Adjust the panels as needed to ensure they open and close smoothly.

Step 5: Install the Hardware
Once all panels are hung, install the handles and any additional hardware included in your bifold door kit. Ensure that all screws are tightened securely and that the handles operate smoothly.
Step 6: Adjust the Panels
After installation, check the alignment of the panels. They should open and close without resistance. If necessary, use the adjustment screws on the top and bottom pivots to fine-tune the alignment.
Step 7: Seal and Finish
To complete the installation, apply caulk around the edges of the door frame to seal any gaps and improve energy efficiency. This step is especially important for exterior bifold doors. Allow the caulk to dry according to the manufacturer’s instructions.
Maintenance Tips
Once your bifold doors are installed, proper maintenance will ensure they remain in good condition. Here are some tips:
- Regular Cleaning: Clean the tracks and panels regularly to prevent dirt and debris from accumulating. Use a soft cloth and mild detergent to wipe down the surfaces.
- Lubricate Moving Parts: Periodically lubricate the hinges and tracks with a silicone-based lubricant to ensure smooth operation.
- Inspect for Damage: Regularly check for signs of wear or damage, such as cracks in the panels or misalignment. Address any issues promptly to avoid further damage.
Conclusion
Installing bifold doors can significantly enhance the functionality and aesthetics of your home. By following the steps outlined in this article, you can successfully install bifold doors that provide beauty and utility for years to come. Whether you are a seasoned DIY enthusiast or a first-time installer, careful planning and execution will lead to a successful project. Remember, if at any point you feel unsure about the installation process, don’t hesitate to consult a professional for assistance. Enjoy your new bifold doors and the beautiful views they provide!